How to measure distances in technical drawings
Measuring distances in PDF documents is really easy.
If you frequently work with technical drawings, PDF Annotator can be really helpful by providing a set of tools to measure distances, perimeters and areas in PDF documents.
In this tutorial, we want to look at measuring distances.
Let's have a look at this example. The technical drawing shows a sectional view of a small gear box.
To activate the Measure Tools, we click the Measure tool icon on the toolbar above the document.
To make sure we measure distances, we click the Measure Distance icon in the toolbar below.

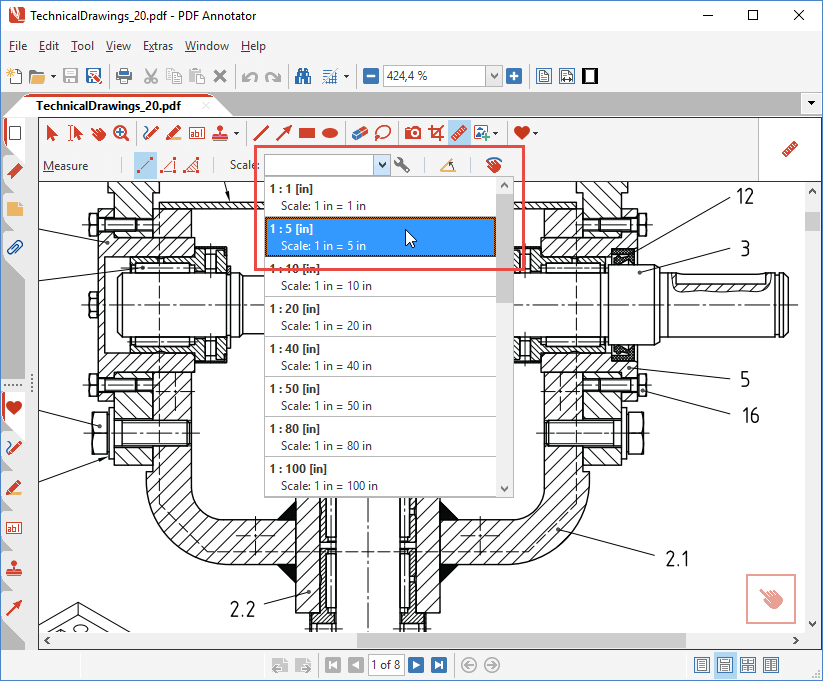
From the drawing's title block, we know that this drawing is in 1 : 5 scale.
So we head to the Scale dropdown list in the toolbar, and select the 1 : 5 scale.
We select 1 : 5 [in], as we want to measure in inches.
Note: For a metrical drawing, we could have scrolled down the list for 1 : 5 [mm].
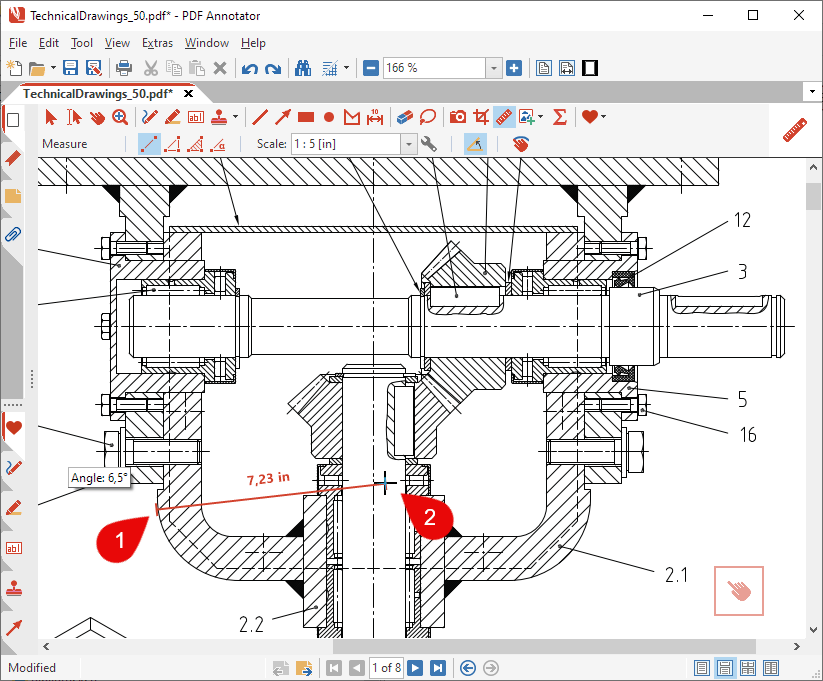
Now, we want to measure the diameter of the gear box case.
So we click the left side of the case to start measuring (1) and drag the cursor over to the right side (2) while keeping the mouse button pressed.
A red line shows the distance we're about to measure.
As you can see, we constantly see the length we are measuring. Additionally, a small popup window next to our starting point shows the current angle.
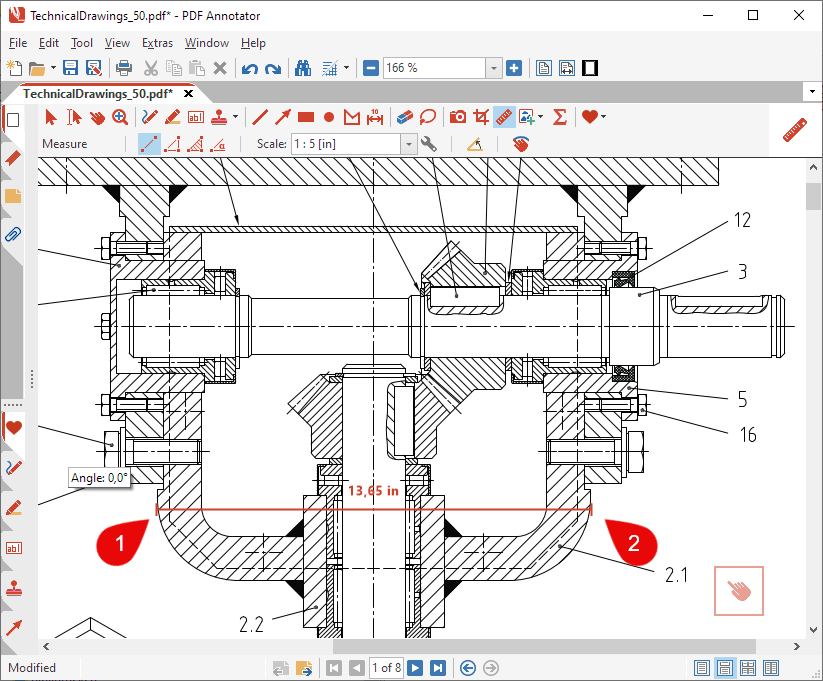
Once we release the mouse button (2), we end the measure process.
The measure result will still be visible. It will stay present until we click somewhere else, or press the ESC key.
Hint: There are two ways to measure a distance. Either you hold the mouse button down while dragging, and end measuring by releasing it (mouse down - drag - mouse up), or you first click the starting point, then move to the end point, and click again (click - drag - click). Try both methods, and use whichever you prefer!
That's it! As you've seen, with PDF Annotator's help, measuring distances is really easy!
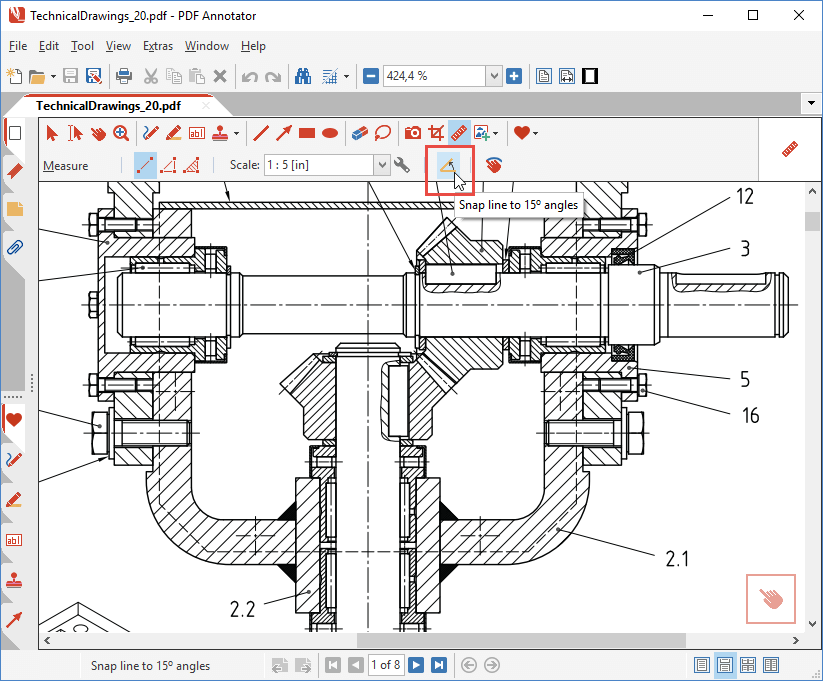
Bonus Tip: Horizontal/Vertical Measures
In many cases, we want to measure either horizontally, or vertically.
To get help with that, it can make sense to enable the Snap line to 15° angles option for the measure tool.
Try to enable this option and measure again.
You will see that the tool automatically snaps to horizontal or vertical angles, or any 15° steps in between.
Just click the Snap line to 15° angles option one more time to toggle it off again. You can turn this option on and off as you need it. When you notice that the measure tool snaps in steps of 15°, and that is not what you need, just disable the option.
Bonus bonus tip: If you only want to use the Snap line to 15° angles option on a case by case basis, when using the mouse down - drag - mouse up method (see above), just press the SHIFT key while dragging.
By the way: PDF Annotator can even help you, if your drawing's scale is not in the Scale list! Just read the tutorial Measuring distances with custom scales.
Note: Use the Measure tool to pick metrics from a document. If you want to create annotations that persist with the document, use the Dimension tool instead.