How to create a stamp from an image
Creating stamps from existing images is pretty easy!
PDF Annotator comes with a large set of default stamps, like symbols, arrows, and text stamps. In addition, you can create your own stamps from various sources. For example, we have looked into creating custom text and date stamps before.
But sometimes, we need a stamp based on an image source. This could be a logo, some custom graphics, or even a scanned signature.
Creating a stamp from an image is pretty straight forward. All we need is the image file.
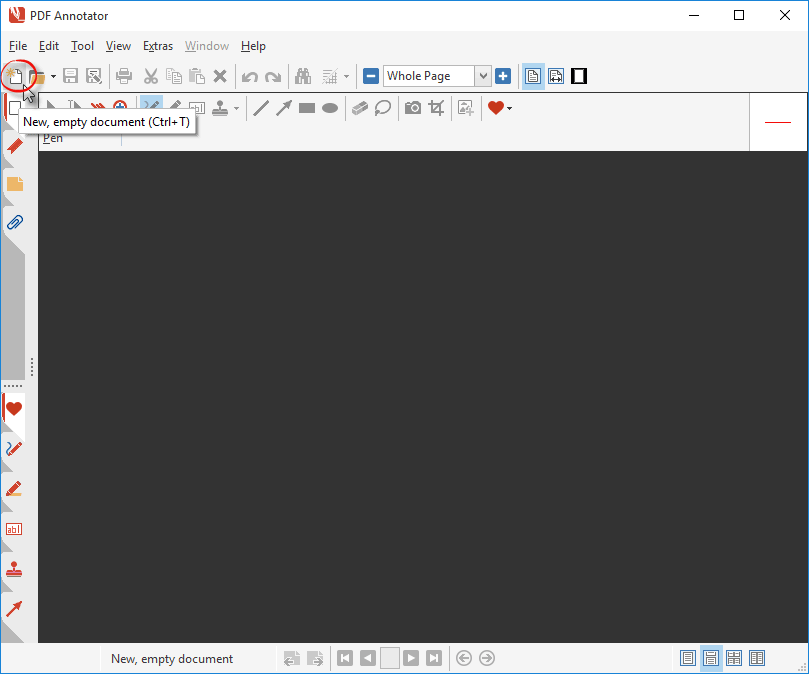
First, we click the File, New command, so we have a blank new document, which we'll need as a scratchpad.
Next, we open the Stamp toolbox with a click onto the tab on the left with the stamp icon on it.
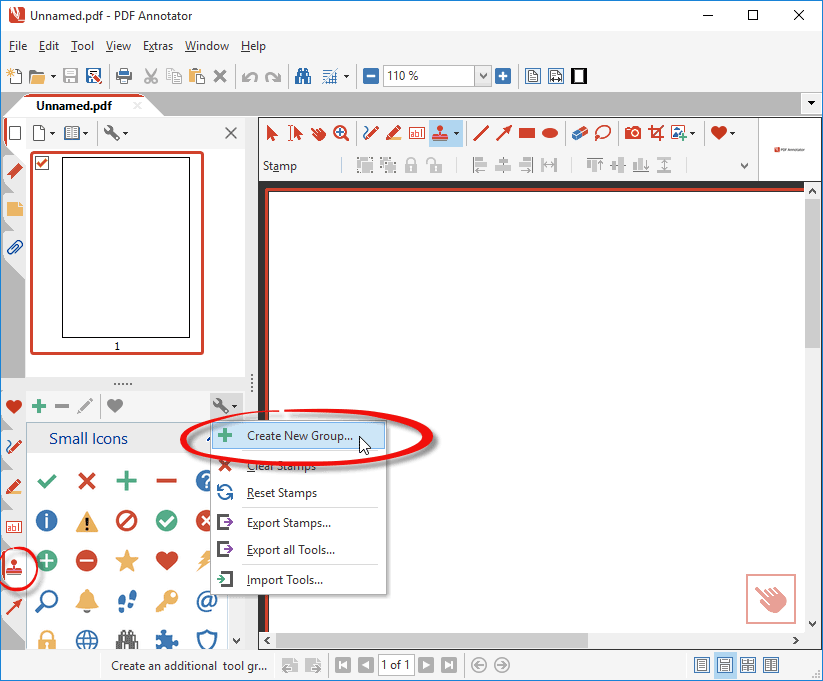
Although, this is just an optional step, let's first create a new group within the stamp toolbox, for our own stamps.
Click the Tool icon on top of the toolbox, and select Create New Group....
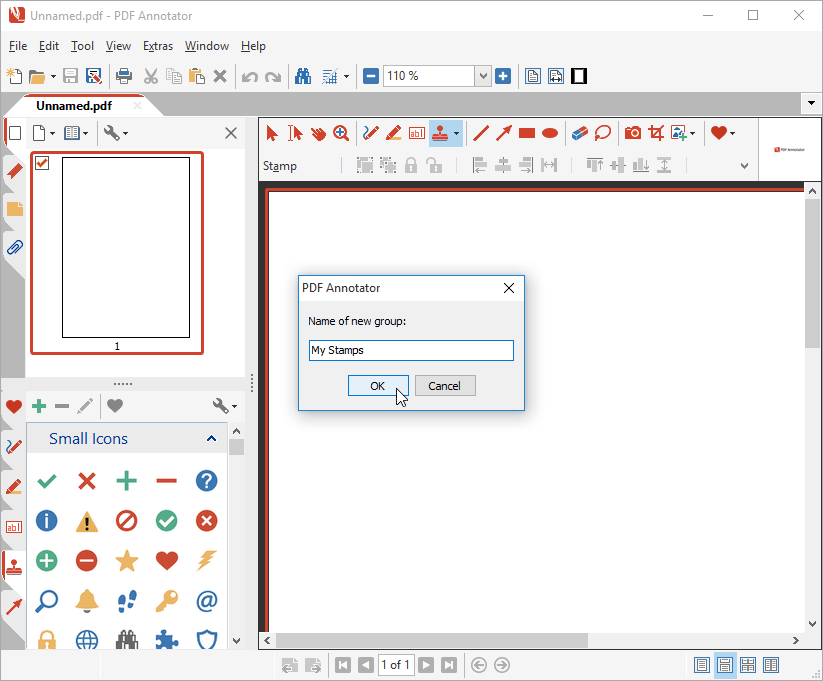
Enter a name for your group and click OK.
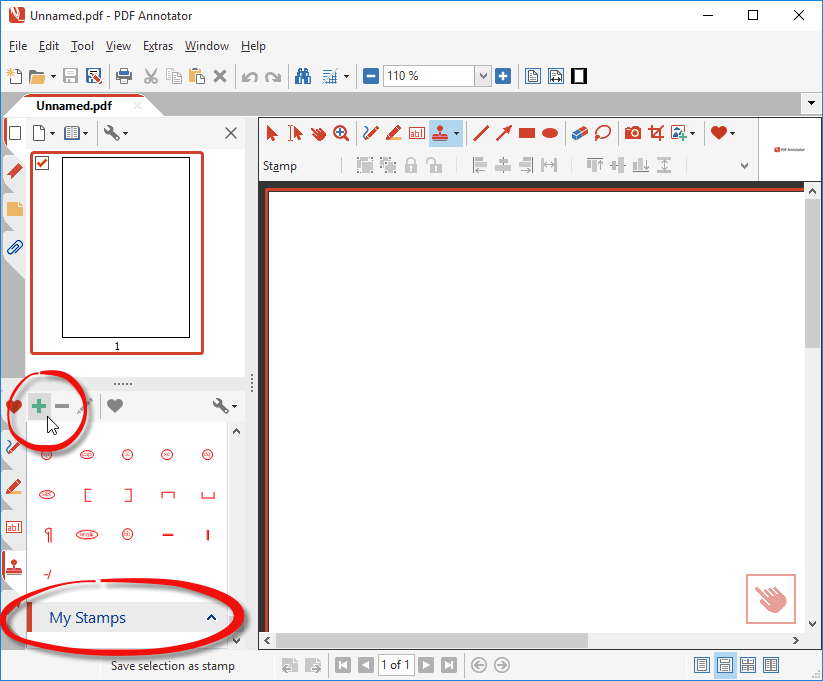
As you see below, the new tool group has been created within the Stamps toolbox. In our example, we chose the name "My Stamps".
Now, click the Plus button on top of the toolbox.
This will open the Configure Tool... window, where, under Create stamp from, we're going to click the Image button, and click From File... on the button's menu.
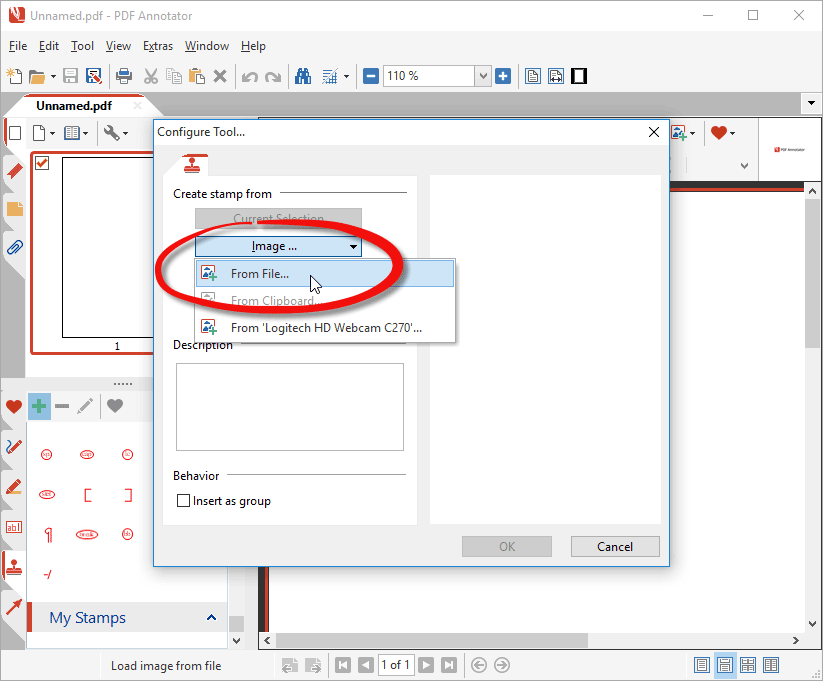
This will bring up an Open dialog, where we can navigate to the image file we want to convert into a stamp. After selecting that file, and pressing the Open button, PDF Annotator will display the image we chose in the Edit Image window.
In our example, we chose an image file that contains the PDF Annotator logo.
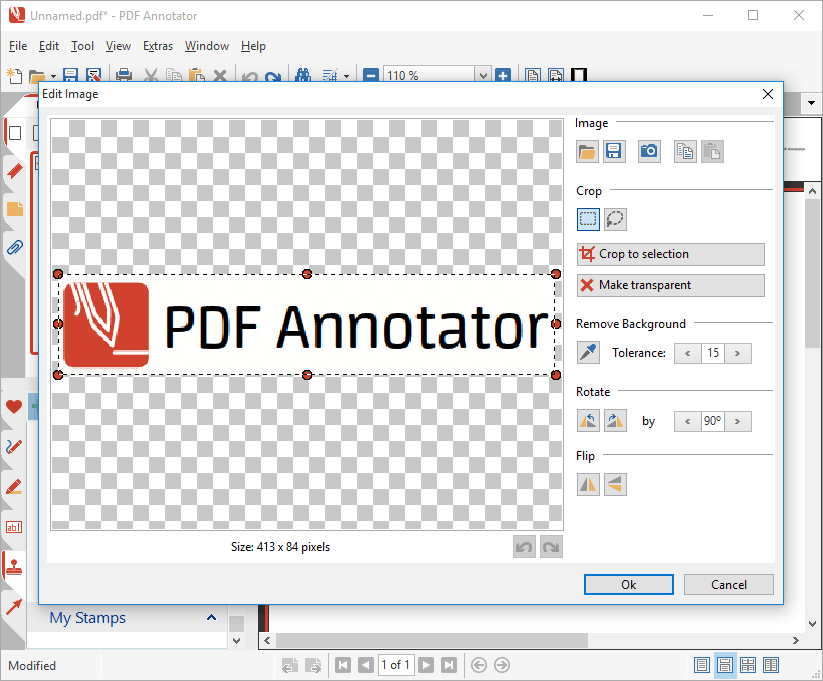
Let's click OK in the Edit Image windows, since we want to use the image as is. Of course, we could make use of the various options in the Edit Image window to modify the image before creating a stamp from it, though.
Clicking OK gets us back to the Configure Tool window.
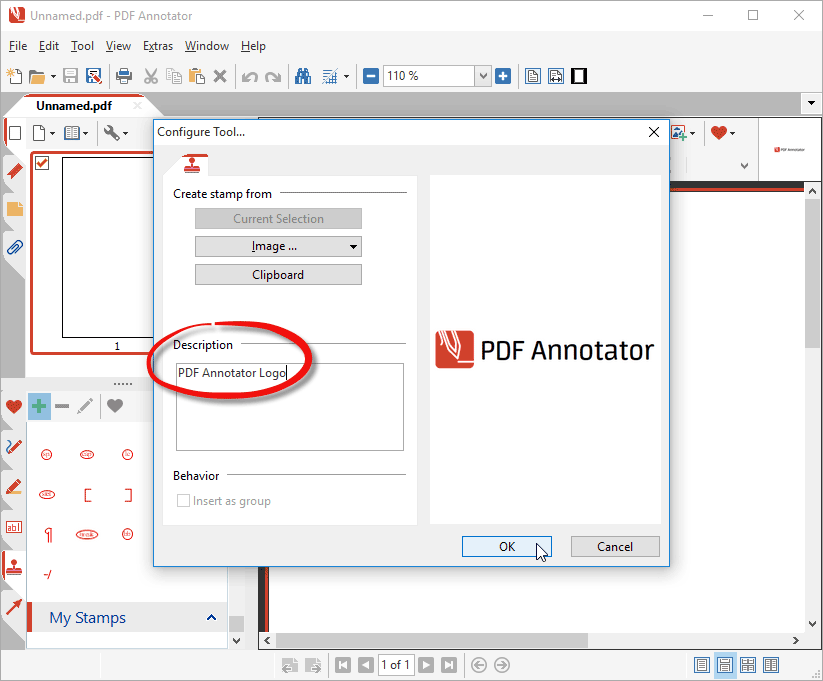
Before we press OK again to finally create the stamp, we can enter a Description for stamp. This will later make it easier to identify the stamp on the toolbox, as the description will get displayed as a small tooltip when you hover of the stamp in the toolbox.
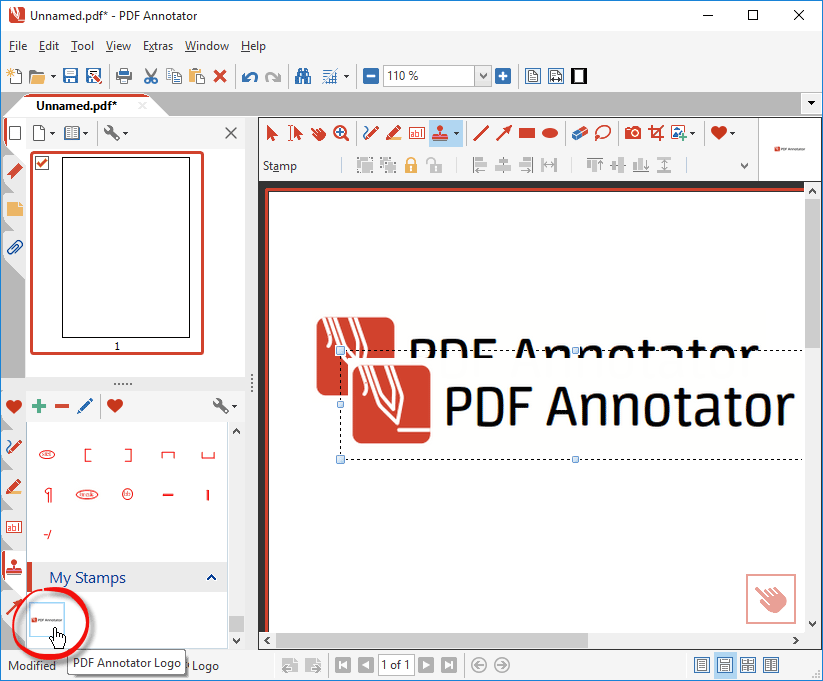
Let's try the new stamp right away! Just click the stamp in the toolbox, and click somewhere into the blank document to place it. Et voilà! Here it is!
BTW, above, I placed the stamp twice to show that it has a white background which covers anything behind the stamp. That's because the original image had a white background, too. In a different article, we show how to make a stamp transparent.