How to create complex stamps with Inkscape
Let 3rd party imaging tools help you to create more complex stamps
As you know, you can use any annotation created in PDF Annotator, and create a stamp from it. Even groups of annotations can be converted to re-usable stamps. This already provides countless possibilities for custom stamps.
But sometimes, these options are still not sufficient. Think about this stamp:

This is not a super complex stamp, as we want to keep it simple for this example. This stamp could be created using a text box tool in PDF Annotator, setting a border width, and rotating it. But there would be some drawbacks:
- The border's corners would not be rounded.
- When you wish to resize the stamp after applying it on a document, you need to update the font size as well.
To work around both issues, we're going to create this stamp as an image, instead of using PDF Annotator's annotation tools.
All we need is an application to create the image with. We recommend using a vector graphics editor for this task.
Using a vector graphics editor will have a couple of benefits:
- You can edit every aspect of your stamp multiple times while creating it.
- You can save the "design" for your stamp and re-use it later to create different stamps based on the same template.
You probably already have a vector imaging application installed, like Corel Draw or Adobe Illustrator. But if you don't have any of those, we recommend using a free application called Inkscape.
Installing Inkscape
First, we need to download Inkscape for Windows and install it. We recommend to choose the Installer (exe) download for your Windows version (32-bit or 64-bit). These days, you will most probably have a 64-bit version of Windows. But if you're not sure, you can find the information after right clicking This PC in Windows Explorer, and selecting Properties.
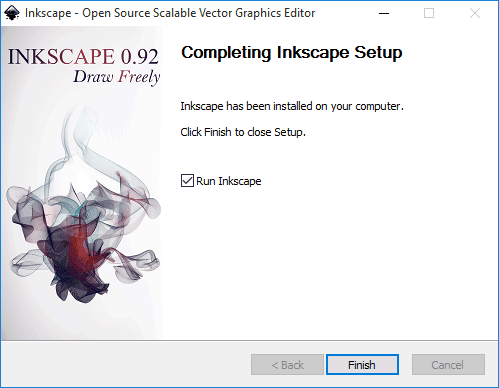
Once the download has finished, run the downloaded setup and confirm the prompt to install this software, which will be displayed by Windows. Follow the Inkscape setup by confirming all default settings and finally starting the installation.
Once the installation has finished, confirm to Run Inkscape.
Creating the stamp in Inkscape
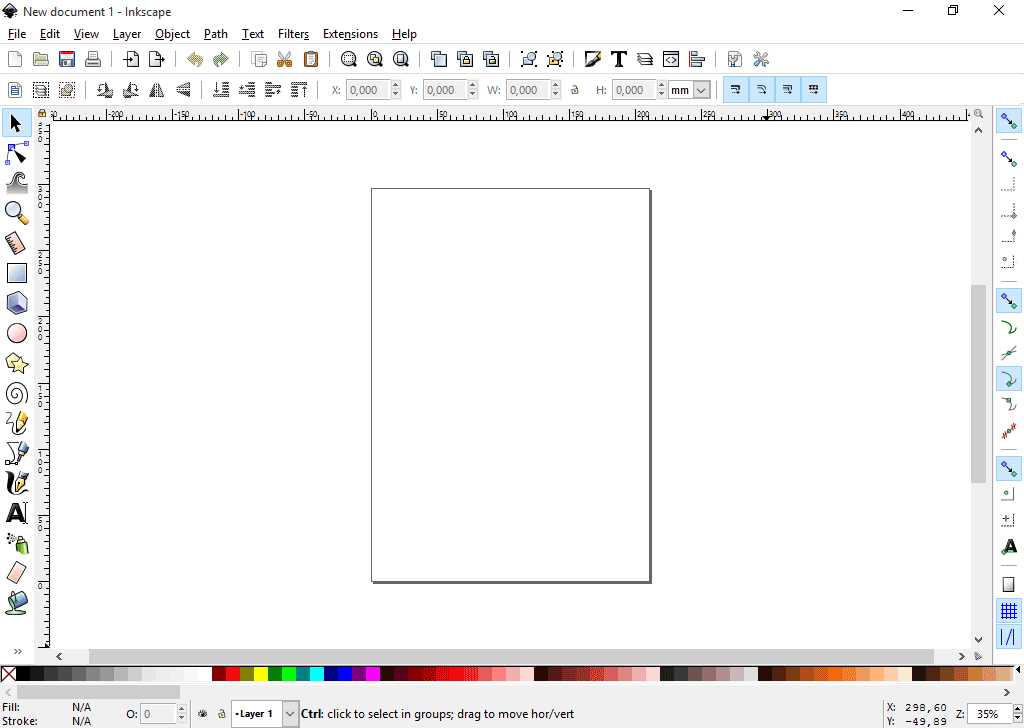
After installing Inkscape, it should look about like this:
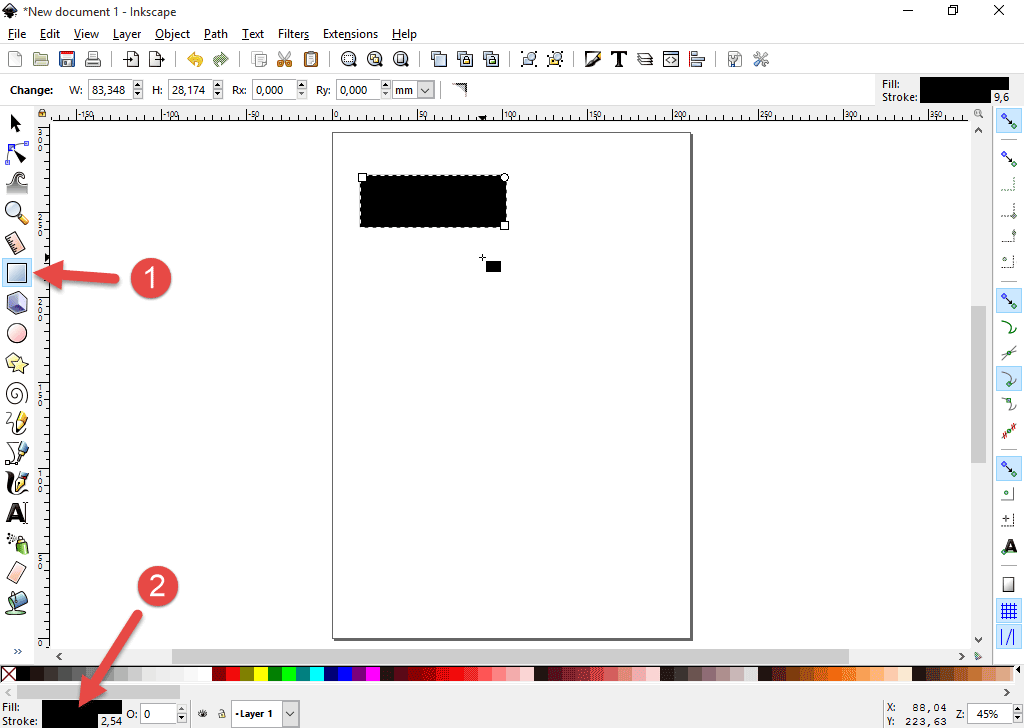
To create our stamp, we first want to draw a box, so we select the rectangle tool (step 1) and draw a rectangle. Then, we double click the area right to Fill in the bottom bar (step 2). This will pull up the Fill and Stroke palette. Alternatively, we can press CTRL-SHIFT-F to open the palette.
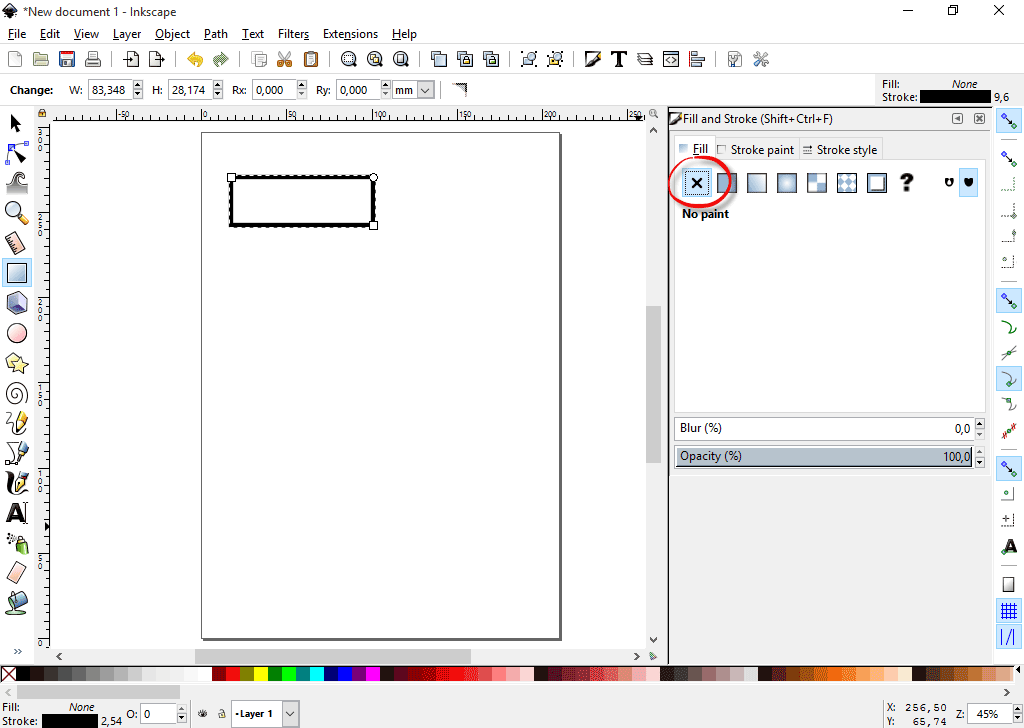
On the Fill tab, we select No paint to remove the fill color from our rectangle.
On the Stroke paint tabselect the second option: Flat color.
On the Stroke style tab, we can increase the width of the rectangle, if we like.
This is going to be the shape of our stamp. But we wanted the shape to be a rounded rectangle. So we need to select the Edit paths tool (step 1). Now we can grab the top right corner of our rectangle (step 2), and pull it down (step 3), which will make all corners rounded.

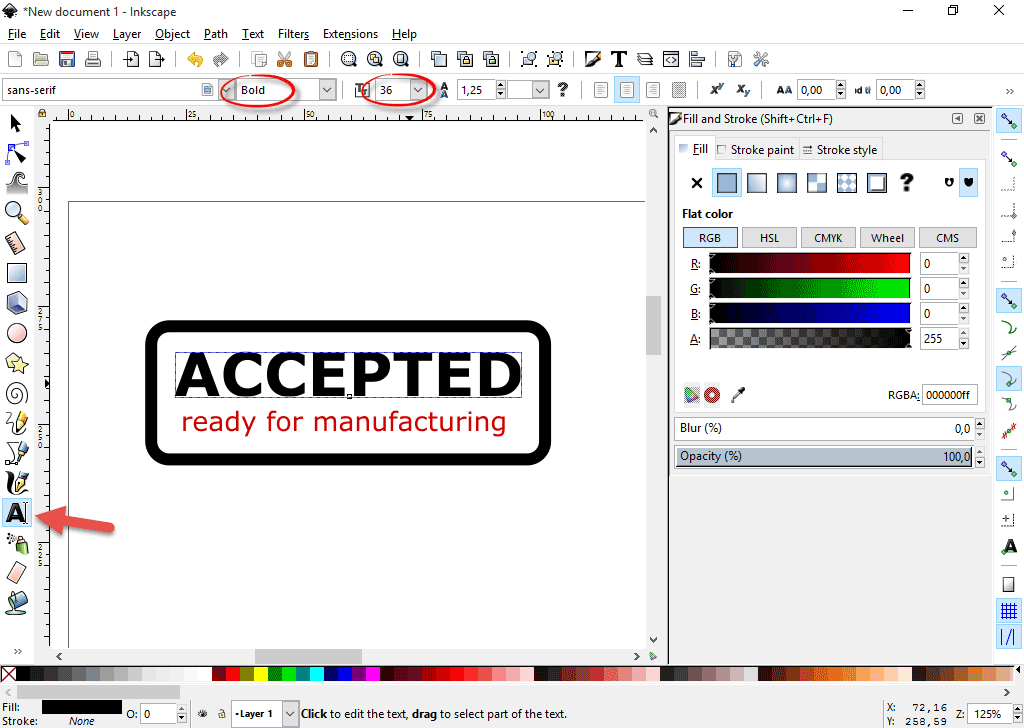
Now we can add our text to the stamp using the Text tool and setting various text properties, like font, font size, and fill color.
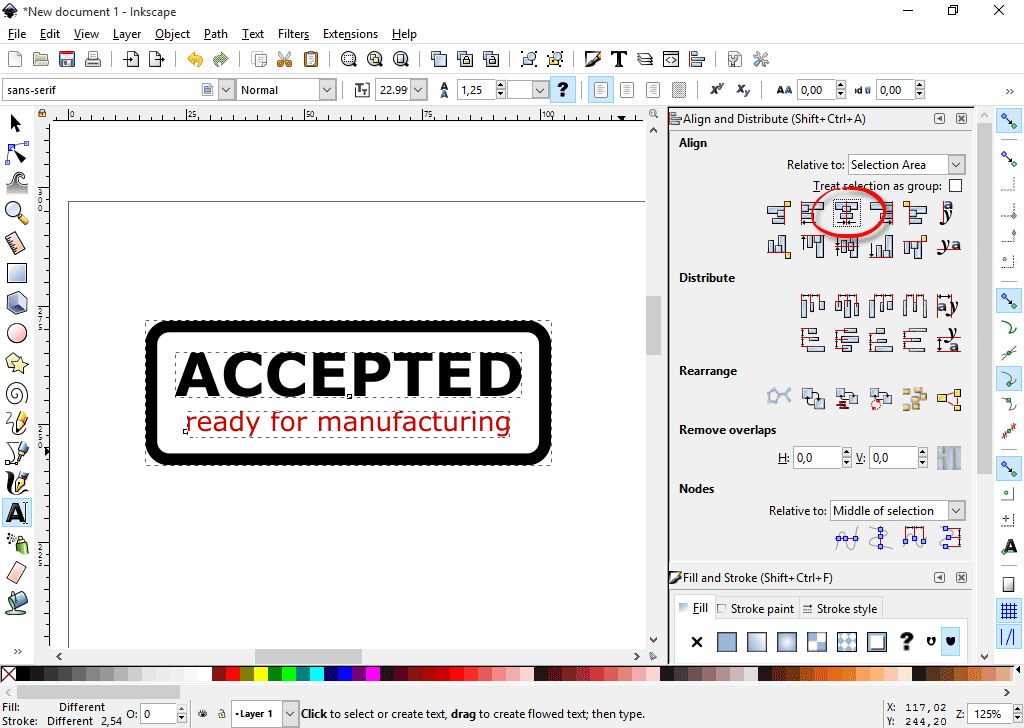
Finally we can align all elements, so the layout really looks clean and professional. We select all elements with Edit, Select All (CTRL-A). Then, we pull up Object, Align and Distribute (CTRL-SHIFT-A) and select Center on vertical axis.
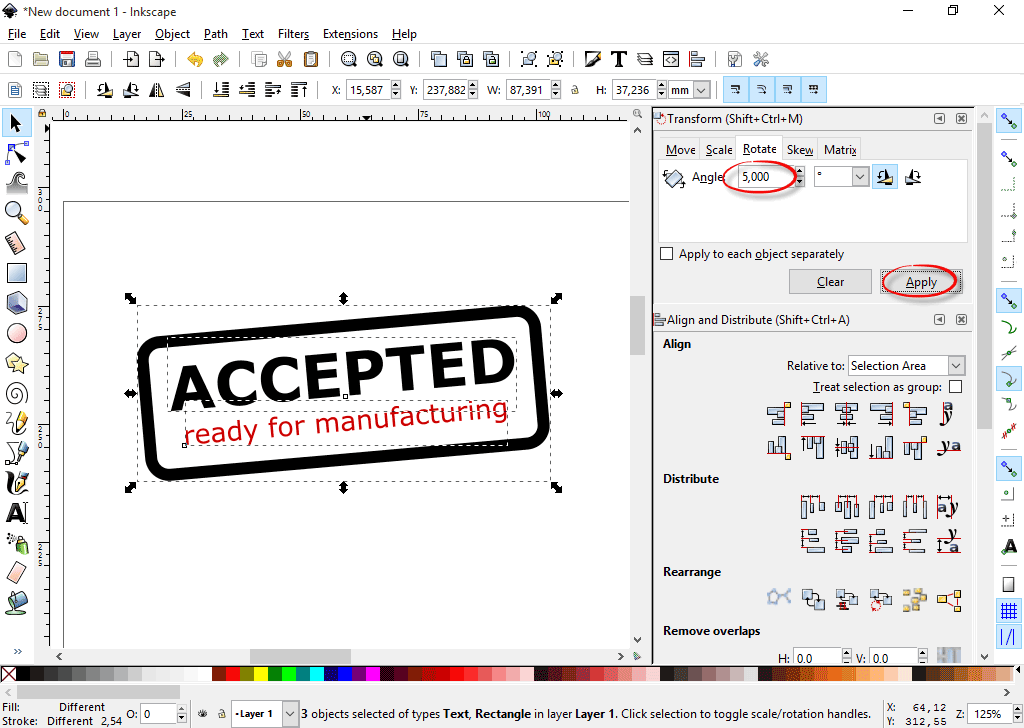
And as a last step, we're going to rotate the whole stamp a little bit by selecting Object, Transform (CTRL-SHIFT-M), entering an angle under Rotate, and pressing Apply.
That's it! Let's now save our stamp as an Inkscape SVG vector image with File, Save as, so we can re-use it in Inkscape later.
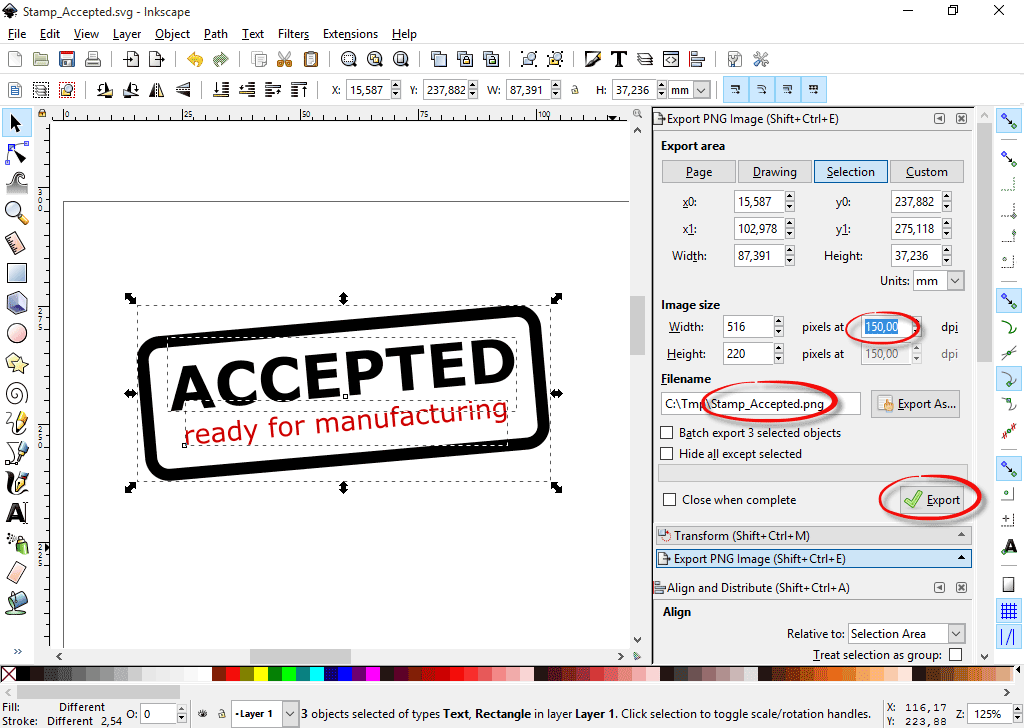
To transfer this stamp over to PDF Annotator, we want to export it as a PNG image, which can be read by PDF Annotator, and which will be able to keep your stamp's transparency, which may be important, depending on your specific design.
Select File, Export PNG Image (CTRL-SHIFT-E) in Inkscape to open the export panel.
And here is the big trick: To make the stamp look more "sharp" in PDF Annotator we want to store it in a high resolution. To accomplish that, we're going to set the DPI setting under Image size to 150.
One more tip: Make sure that Width and Height under Image size stay beyond 1024 to prevent PDF Annotator from sizing these images down later on. Otherwise, resize the objects by keeping them all selected, then dragging the bottom right drag handle while keeping the CTRL key pressed, if required.
Then, all we need to do is to set a path and filename for the PNG, and finally click the Export button.
Creating a group in the stamp toolbox
Now, let's move over to PDF Annotator to create our stamp.
Firstly, we're going to create a group within your Stamp toolbox, where we want to place your signature stamp in. Of course, you can skip this step if you already have one.
Open the Stamp toolbox with a click onto the tab on the left with the stamp icon on it.
Click the Tool icon on top of the toolbox, and select Create New Group....
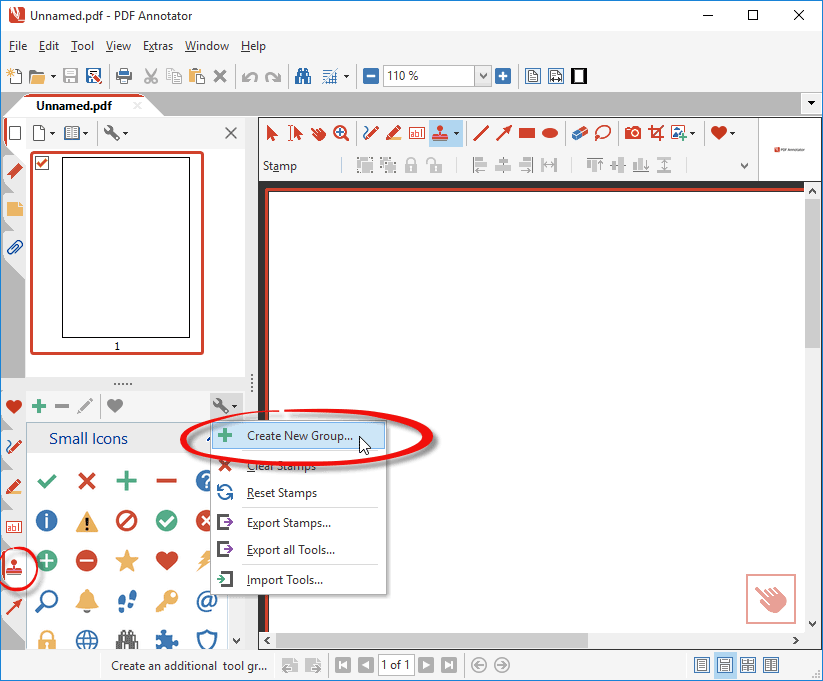
Enter a name for your group and click OK.
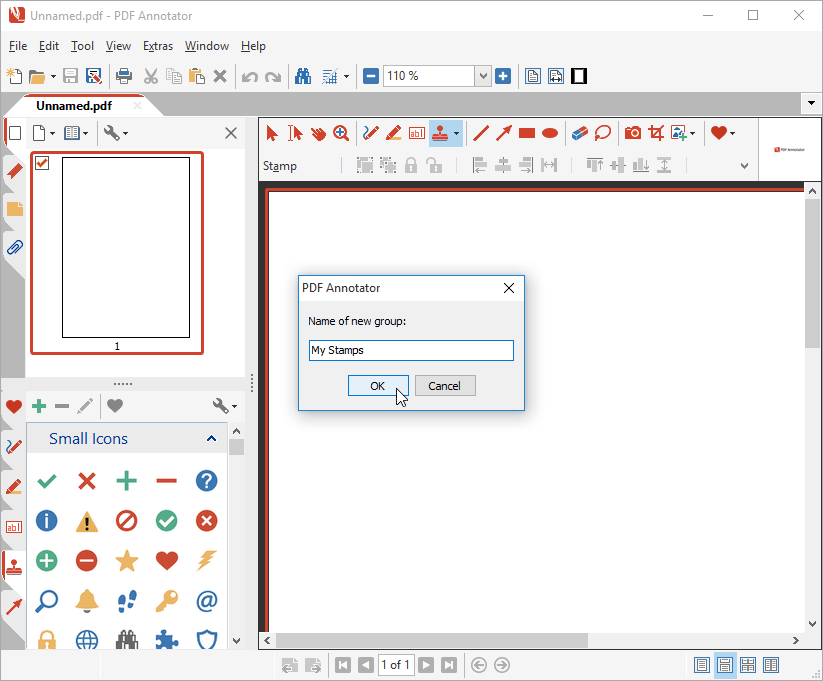
As you see below, the new tool group has been created within the Stamps toolbox. In our example, we chose the name "My Stamps".
Creating the stamp from the PNG image
Now, click the Plus icon on top of the stamp toolbox (step 1). This will open the Configure Tool window.
In the Configure Tool window, click the Image... button, and select From File... (step 2).
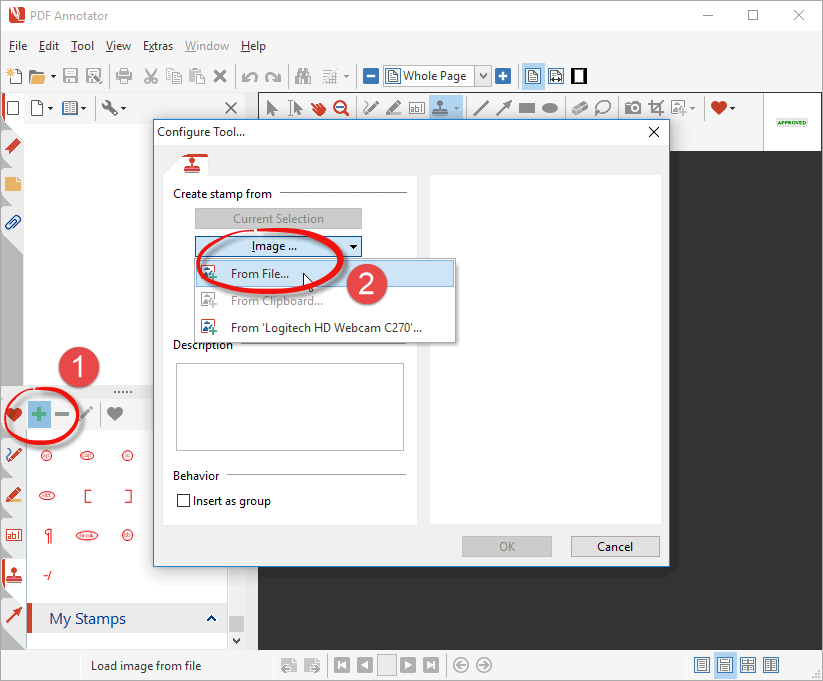
Locate and select the PNG file you previously saved by exporting it from Inkscape.
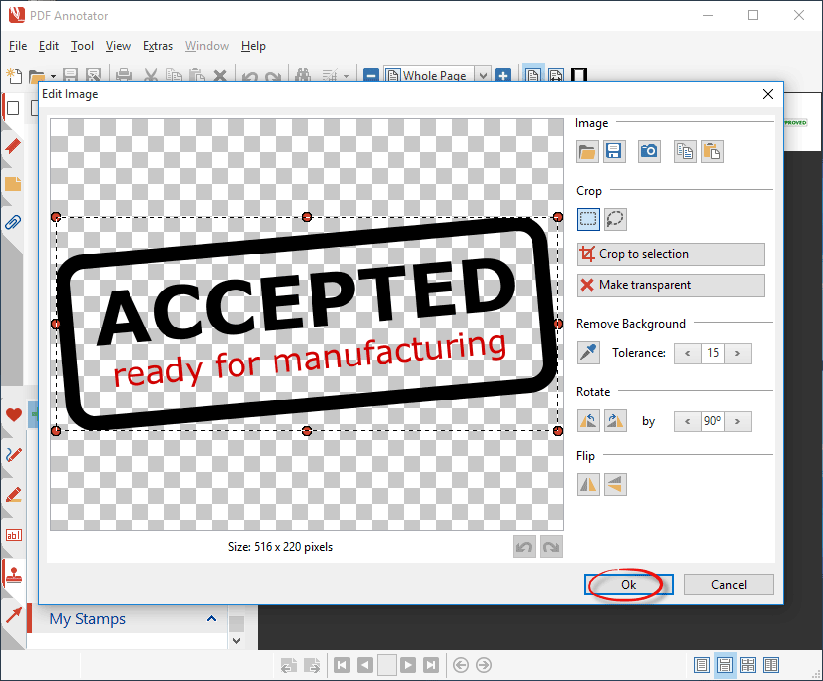
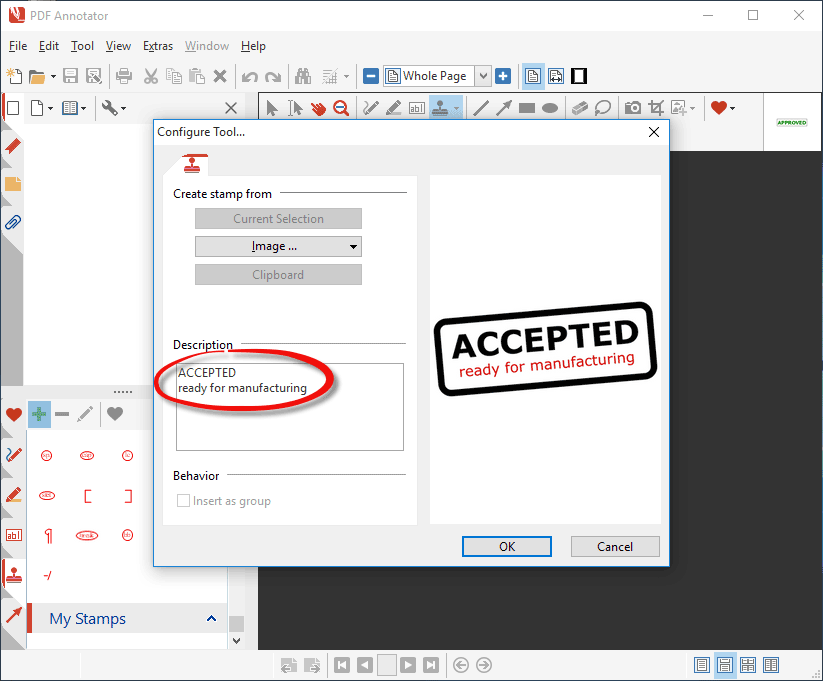
After selecting the file, it will get loaded into PDF Annotator's Image Editor. As you can see in the preview within the Image Editor, the stamp has kept its transparency. Confirm with OK.
Finally, enter a Description for your new stamp and finish the stamp creation process with OK. The description will later make it easier to identify the stamp on the toolbox, as the description will get displayed as a small tooltip when you hover of the stamp in the toolbox.
Trying and resizing the new stamp
You can now try your newly created stamp! Click File, New to create a blank new document as a scratchpad. Now, place your stamp in the document, and also try to resize it.
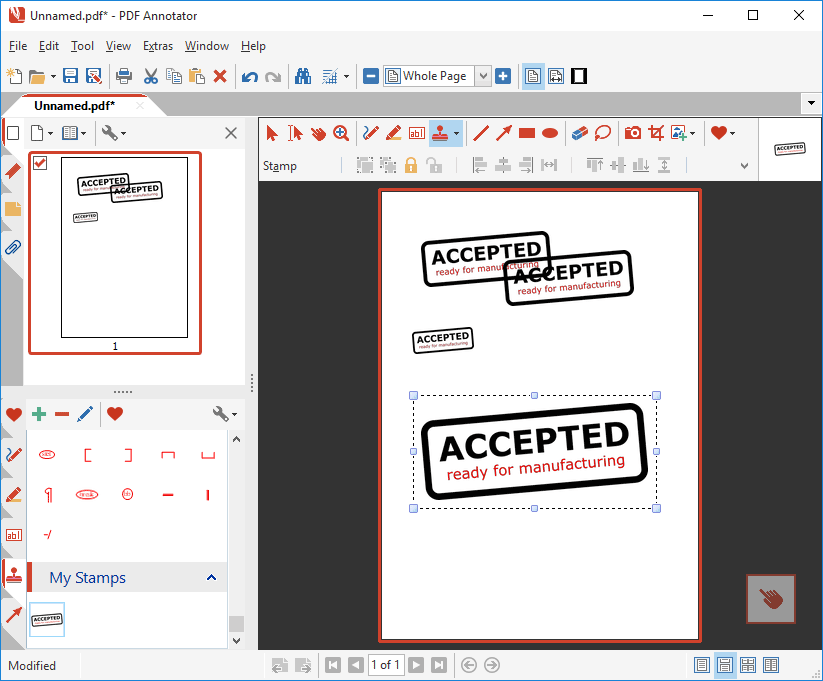
As you can see, the stamp is transparent, and can be scaled pretty well. Mission accomplished!