Adding Page Numbers
There may be times when you get a large PDF document that doesn't include page numbers. If you're collaborating on a project, this can be a problem. Which page of the printed document am I actually holding in my hands? Which page number is the person you are talking to referring to? Page numbers make it easier to select pages that need to be discussed.
PDF Annotator has a great feature that allows you to paginate a document quickly, either permanently or temporarily. In the first part of this article, we'll look at how to apply basic numbering to your document. In the second part, we'll cover some more advanced options.
Basic page numbering
 Open a PDF file in PDF Annotator that does not contain page numbers.
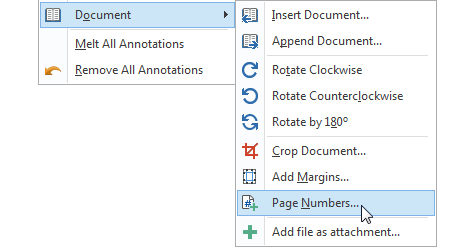
From the standard menu, click on Edit; then scroll down to Document and then over and down to Page
Numbers....
When you click on Page Numbers, you will get a pop up dialog box for your settings.
Open a PDF file in PDF Annotator that does not contain page numbers.
From the standard menu, click on Edit; then scroll down to Document and then over and down to Page
Numbers....
When you click on Page Numbers, you will get a pop up dialog box for your settings.
You will see a tab labeled Range 1. On this tab, you will find the default page-numbering format for your document. You could click OK right away, and your document would be numbered! But you can also change these options easily. You are able to change:
- The start and end numbers
- The start value
- The numbering format
- The font, size and color of the numbers, and
- The position on the page they will be located.
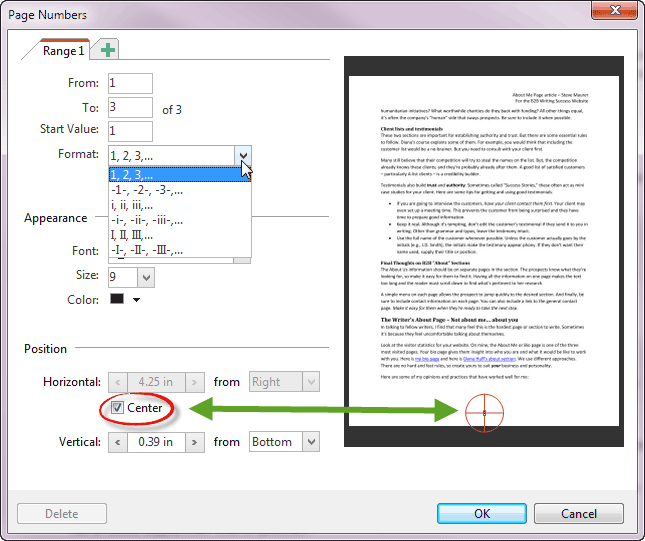
By default, the numbers will be located at the bottom center of the page. However, you can move them up and down easily, using the crosshairs circle. If you uncheck the Center box, you can move them left or right as well. You can drag the crosshairs circle to the new position or use the input boxes in the Position section for a more precise positioning.
If you prefer to position the page numbers on top of each page, select from top - do not just move them up with the crosshairs. That way, you make sure your page numbers will always be positioned correctly, even if your document contains pages with different sizes. The same applies for the from right and from left settings.
After making your choices, clicking OK will place the numbers into the document. You can come back to the Page Numbers dialog again, if you want to change any of the settings above.
If you later insert, append or delete pages to or from your document, or if you move pages, your page numbers will of course be updated automatically!
Using page ranges
An advanced feature that you can use is applying numbers to page ranges. You can add up to three ranges. Each section can have its own formatting.
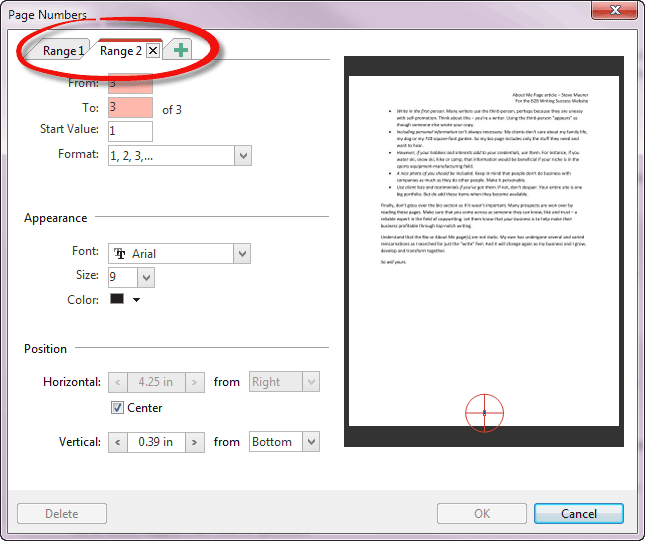
An example of using ranges would be a document that has a table of contents at the beginning, and/or an appendix or table of reference at the end. Use normal 1, 2, 3,... numbering for the main body of work, and then use the i, ii, iii,... format for the table of contents, and the Roman I, II, III,... numeral format for the appendix. By using different numbering schemes, page numbers in the main body will not change when you insert cover sheets or additional table of content pages in the first range.
The difference between page numbers and annotations
Annotations, stamps and page numbers are all saved with the document. By default, they remain editable and you can change them when you reopen the document.
However, if you Remove all Annotations by using the command under the Edit menu, the page numbers will not deleted. To remove page numbering, open the dialog box you used to create them and click on the Delete button on the bottom left.
You have the option to Melt Annotations, also on the Edit menu, making them a permanent part of the document. Page numbers that you added will also become permanent. If you want to make your annotations permanent parts of the document, but not the page numbers, then delete the page numbers before melting the annotations.