Grouping and Ungrouping Annotations
PDF Annotator comes with several powerful tools to make annotating more efficient and much easier. In this article, we are going to explore one of them: The Group/Ungroup Annotations feature. Once you understand it, you will find yourself using it extensively. If your vocation is education, you will find it useful when grading papers or emailing lecture notes. However, in whatever job or scenario you use PDF Annotator, you will find the group and ungroup feature valuable.
Grouping Annotations
So, let's see how to group annotations, and why.
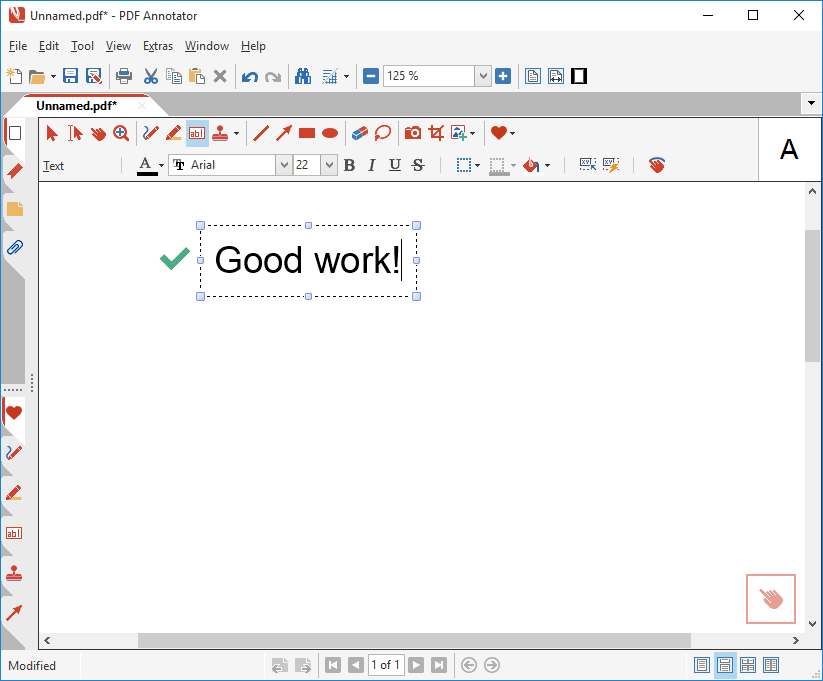
To begin, open a blank new document using the File, New command, and place several annotations or stamps on it, close together. In the example, I’ve used a checkbox stamp and a text box.
Next, the annotations you added need to be selected. You can do this by holding down the CTRL key and clicking on each one. However, an easier method is to use the Select Tool. It’s available on the tool bar or you can press U on your keyboard.
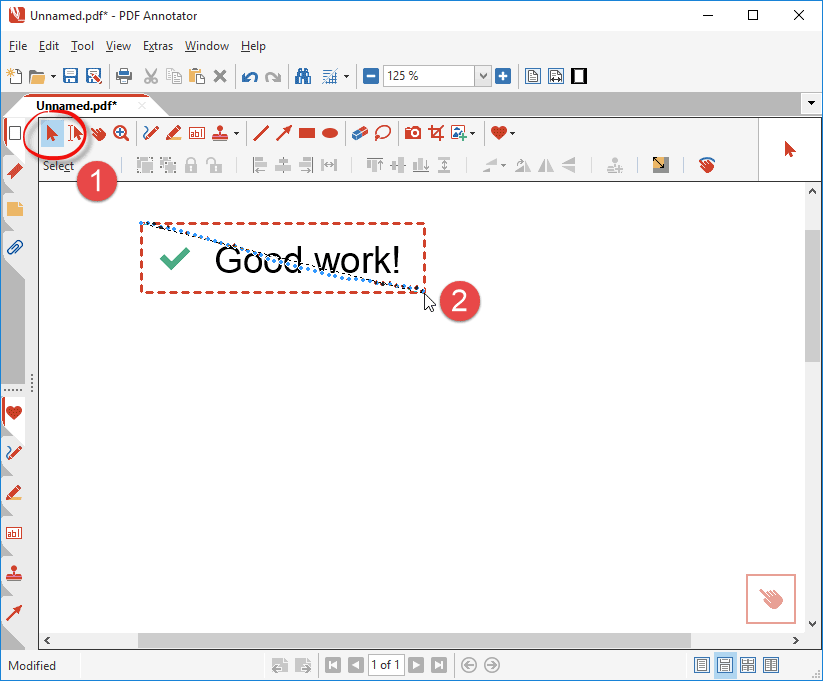
Alternatively, you could use the Lasso Tool to select multiple annotations: Find the Lasso tool on the toolbar, or press S on your keyboard. Draw a lasso around your annotations and they will all be selected.
Now that you selected both annotations, you can move them as a group; however, once you click off of the selection they become separate again.
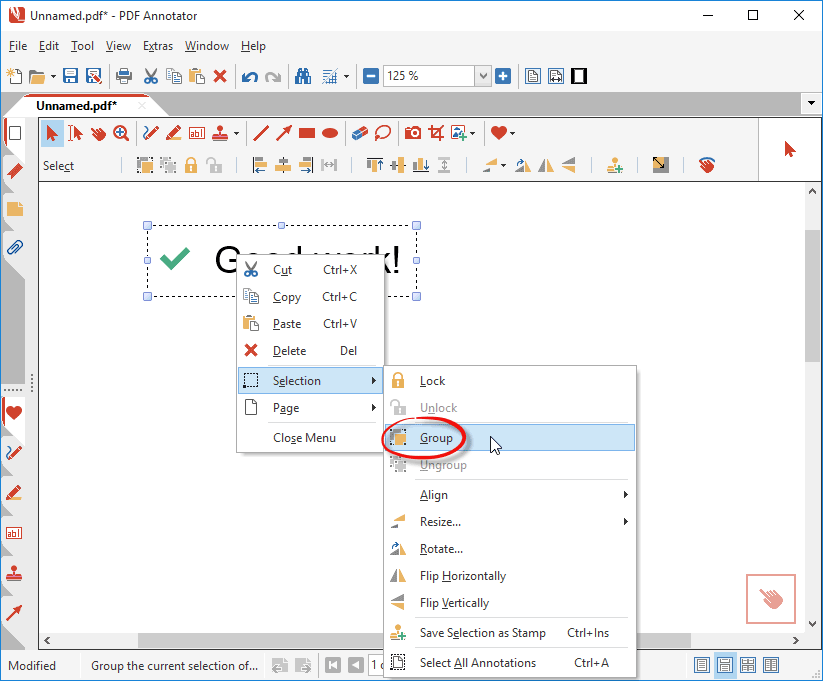
To keep them grouped, right-click inside the selection to get a popup menu. Select Selection, Group on the popup menu. Clicking on Group merges them into one single selection.
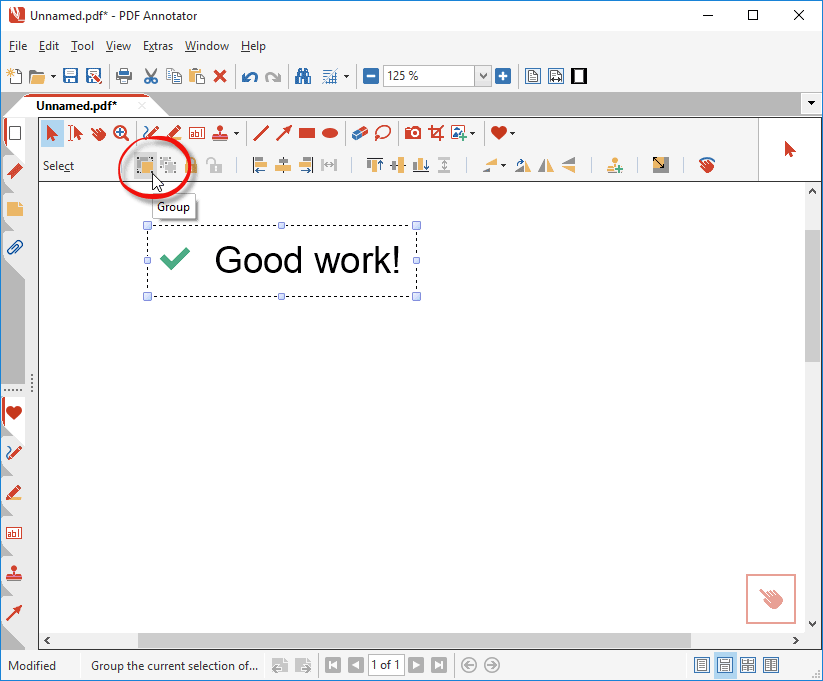
The group of annotations can now be moved together whenever you click on them.
If you want to separate the annotations, select the grouped annotations and right-click to get the menu again. This time, choose Ungroup to separate them. Once you click off the selection, they will become individual elements again.
To group and ungroup the selected annotations more quickly, use the Group and Ungroup buttons on the toolbar.
Grouping and Stamps
As you know, you can save any group of annotations as a custom stamp. Select the group and right-click to get the menu. On the menu, select Selection, Save Selection as Stamp. A dialog box will open where you can enter a description and save the new stamp. The stamp will be available in your Stamp Toolbox whenever you open PDF Annotator.
By default, all elements of a stamp will be added to the document as a group. That means, once you placed it on a document, you can click any part of the stamp, and move the whole stamp as a group.
This is quite nice, but on the other hand, you need to ungroup the elements first, before you can edit any of them individually.
If, for example, you want to edit the text in above stamp, right after placing it in a document, you would first need to select the stamp, ungroup, and then you could go ahead and edit the text box.
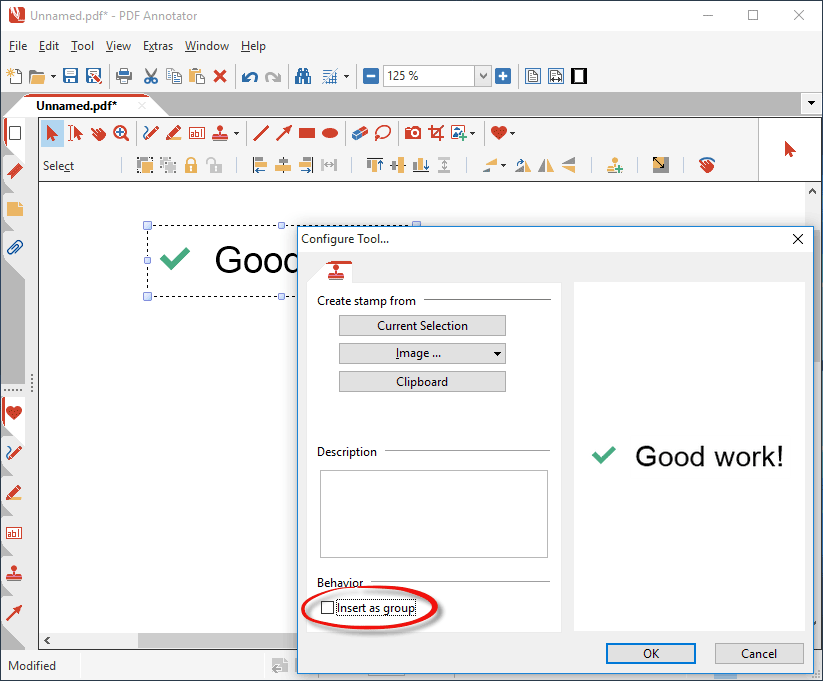
To avoid this extra step, you can define the stamp in a way that it will not get inserted as a group:
- Select all the annotations you want in the stamp, as mentioned earlier.
- Instead of grouping them at that time, just choose to save the selection as a stamp.
- In the resulting Configure Tool dialog box, note the Insert as group check box on the left-bottom. It is checked by default. This inserts the annotations as a group each time you use that stamp.
- Uncheck it to keep the stamps from being grouped. They are still inserted together; they just aren't automatically grouped. You will be able to edit each one individually without ungrouping them first.
And of course, you can also change this behaviour for existing stamps by locating them in the stamp toolbox (the tab with the stamp icon on the botton left), click them, and click the Edit button above.